Building Interactions with the Bitcraze Crazyflie and Motion Capture
From the desk of Dr. M.A. Baytaş
Published
With Tags
Tutorial · Robotics · Python
In our research, we build prototypes with autonomous drones for leisure and wellnes applications at home. With collaborators at Qualisys and Lindholmen Science Park, we recently produced a video that showcases some of our work-in-progress:
This tutorial covers how we implemented the drone's flight behaviors in this video. It's also very similar to how our previous projects like Drone Chi (designed by Joseph La Delfa) work behind the scenes. You can find the full script – along with some of the other code that we are experimenting with – on GitHub.
Our tech stack is based on the Bitcraze Crazyflie. It serves us well for two reasons. First, the Crazyflie is small. There are other drones – like the Tello EDU – that come with programming tools. But the Tello, capable of outdoor flight, is close to 200mm wide and weighs around 80g. Indoors, its noise and prop wash are very uncomfortable. It breaks things on impact. The Crazyflie is under 100mm motor-to-motor, and weighs less than 30g. I can come very close to it with my body and my hands without discomfort. Having crashed hundreds of times -- into my hands, my computer screen, and other objects -- I can vouch that it's safer. Then, the ecoysystem: the Crazyflie is modular and pretty much entirely open-source. We find a variety of "decks" with sensors, lights, etc. to extend the core hardware without doing too much work and adding too much weight. We can publish knowledge and artifacts, unconstrained by IP considerations. There are challenges to this kind of ecosystem; for example, decentralized documentation is harder to navigate. But all things considered, it's great for creative applications. It's like a flying Arduino.
We also use a Qualisys motion capture (mocap) system. Most of the time, we do fine with sensors on the drone, like the Multi-ranger and Flow decks. But mocap can precisely track anything we put markers onto, within the same calibrated coordinate system as the drone, so we can build applications with interactivity and precise flight – like Drone Chi.
Disclosure: My work is sponsored by Qualisys, but the company does not direct or screen our projects and publications.
The way that we use this tech stack is not common. The Crazyflie is popular in engineering labs, and Qualisys is popular for human biomechanics. Their documentation speaks to these audiences. For hackers and designers, we present this tutorial.
Preliminaries
A basic building block for an interactive drone is to have the drone follow another object in real time. We created a Python script to do this.
Our script connects to QTM, receiving pose data in real time; and streams this data to the Crazyflie: we let the Crazyflie know about its own pose for closed loop control, and set a target for it to move to, based on the position of another object.
For the rest of this tutorial, as well as in the code, we refer to the target object as a "controller" and we'll use the word "target" for the actual coordinate that the drone flies to. As you might imagine, if we target the drone exactly where the controller is, we'll crash into the controller. So the target and the controller will be separated by a certain offset. We'll be able to adjust this offset in real time with keyboard commands, which also essentially enables us to fly the drone with the keyboard.
Setup
In QTM, the rigid body for the Crazyflie must have custom Euler angle definitions, configured under 6DOF Tracking in Project Options:
- First Rotation Axis: Z, Positive Rotation: Clockwise, Name: Yaw, Angle Range: -180 to 180 deg.
- Second Rotation Axis: Y, Positive Rotation: Counterclockwise, Name: Pitch
- Third Rotation Axis: X, Positive Rotation: Clockwise, Name: Roll, Angle Range: -180 to 180 deg.
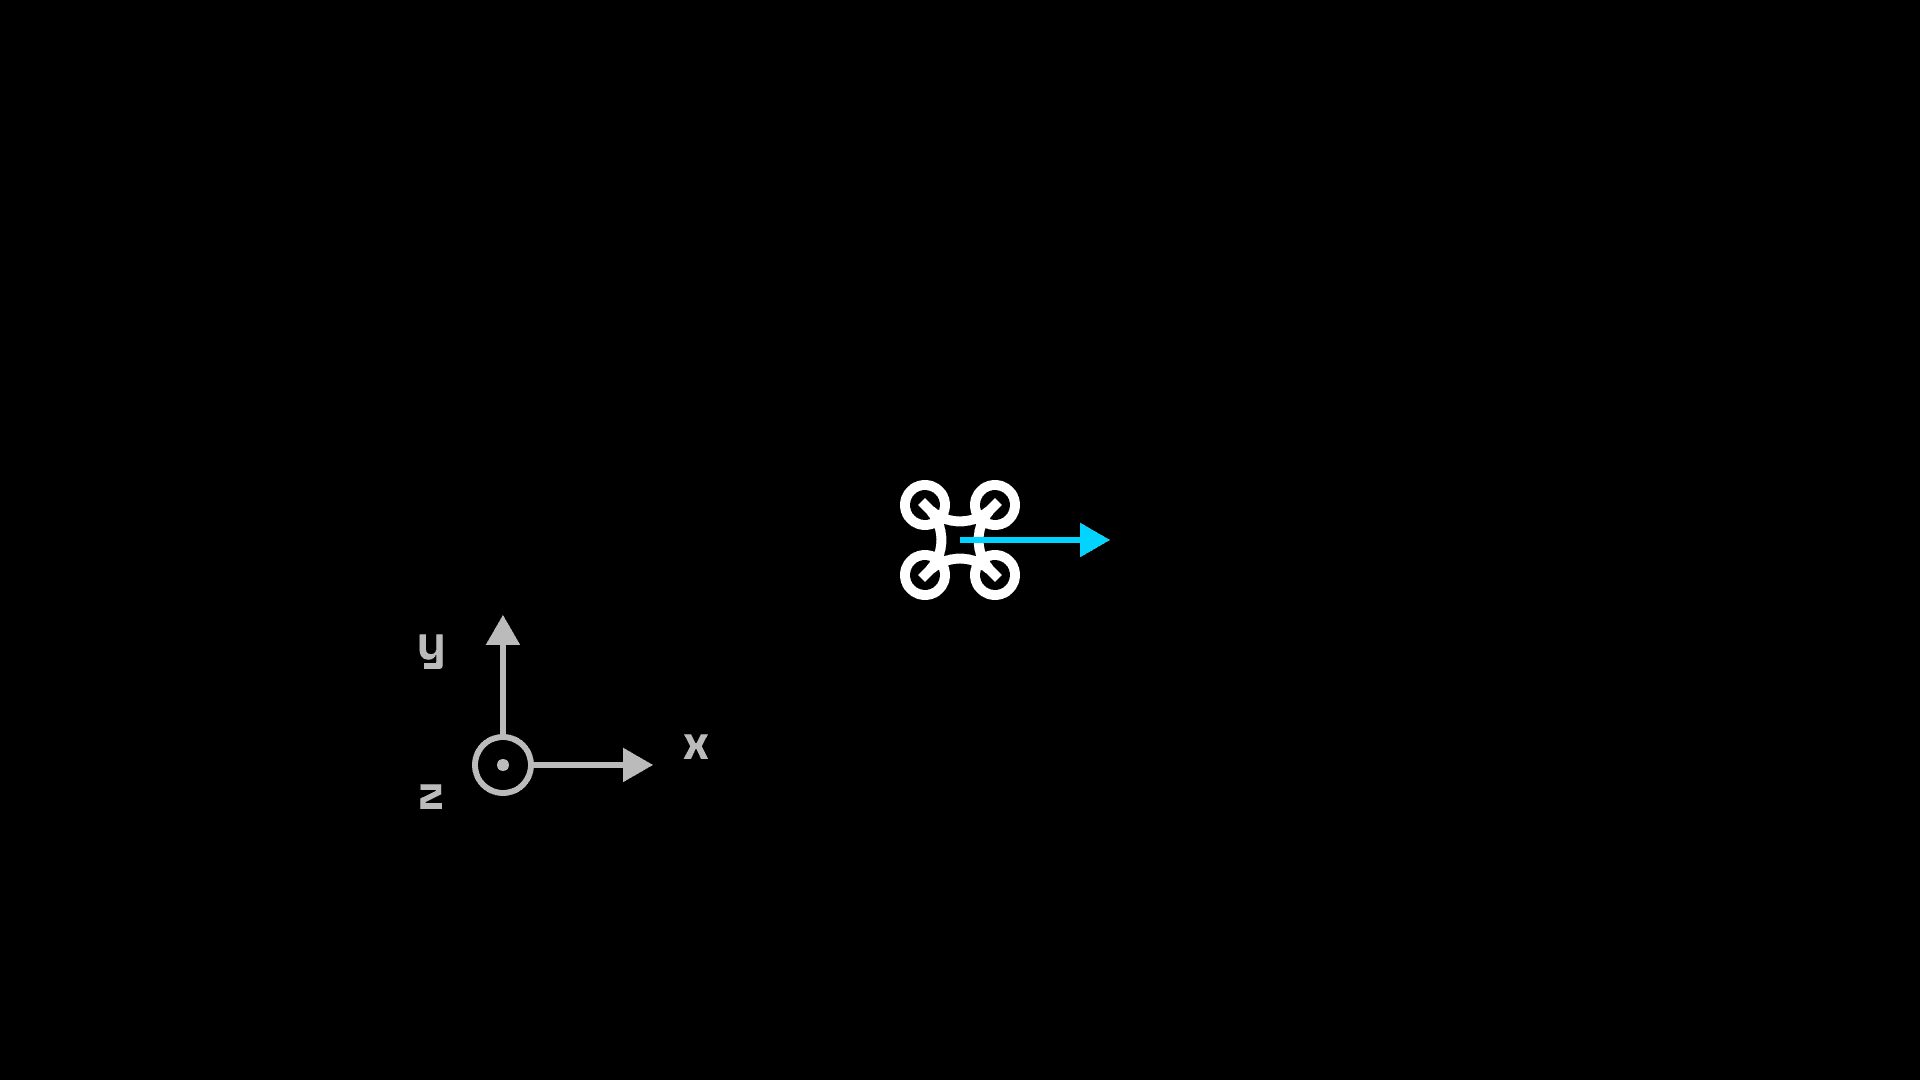
The Crazyflie has to be positioned in a specific way, before each takeoff, in order to fly correctly: the front of the Crazyflie must point to the positive x-direction of the QTM coordinate system. It stability is predicated on correct initial alignment: if the front of the drone is not aligned with the x-direction it will lose control and crash. A few degrees of error is fine, but more than that will give you trouble.
Program Structure
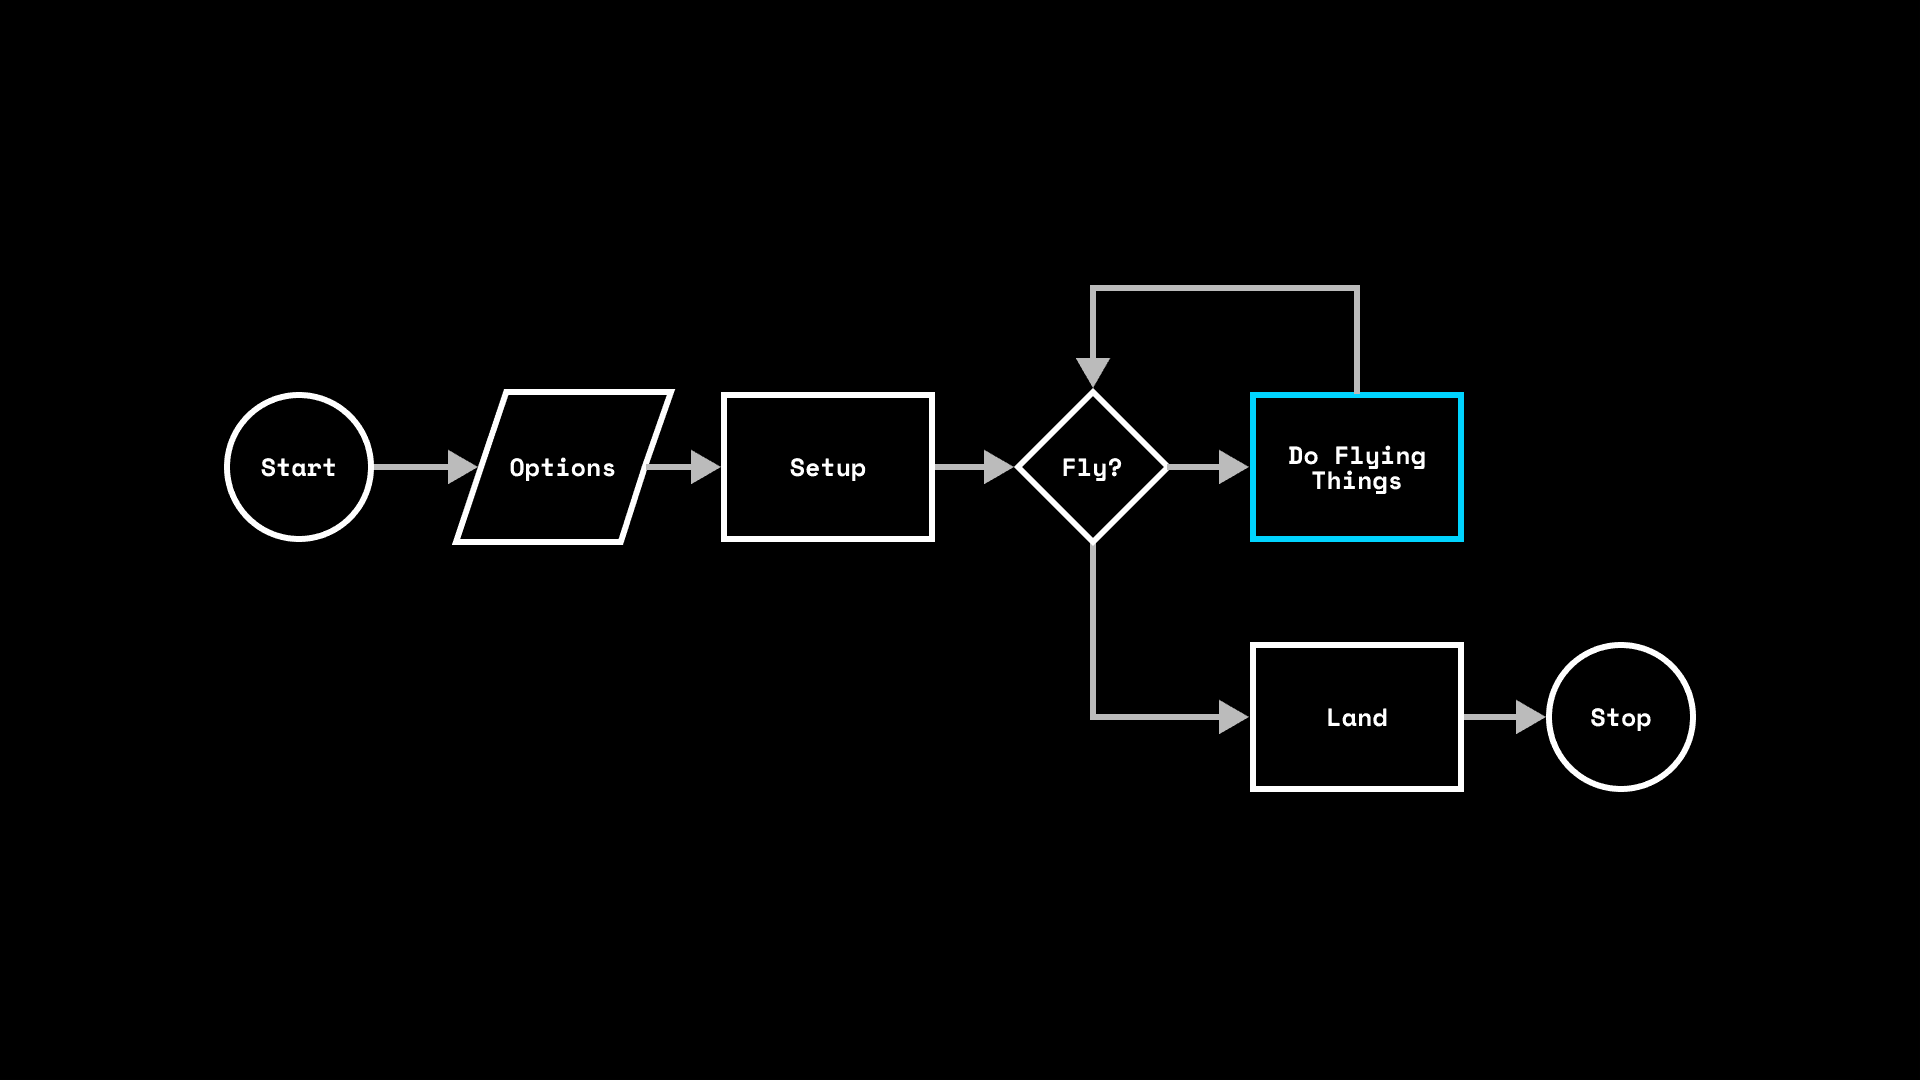
Our script consists of various functions and classes that keep things structured, globally accessible variables to keep track of options and states, and the business end: a main loop.
This is a structure that is common in real-time interactive applications like games and physical computing. It's how Arduino and Processing programs are structured, and how Pygame works.
# Set things up
...

with SyncCrazyflie(cf_uri, cf=Crazyflie(rw_cache='./cache')) as scf:

    # Set other things up
    ...

    # FLY
    while(fly == True):

        # Do flying things
        ...

    # Land
    ...
Safety First
Even though the Crazyflie is small and light, and generally not capable of serious damage; it has a very expensive self-harm habit – it's very effective at destroying its own bits and pieces when it crashes. We need to take some safety measures to protect the drone.
We crashed our drones a lot during development, because the way that the Crazyflie implements flight control out of the box is sensitive to tracking loss and sudden inputs. Thus, our safety measures concentrate on making sure that the drone stays in the mocap tracking volume, doesn't move too fast for it's own sake, and still manages to keeps calm if things go wrong.
Fencing and Tracking Quality
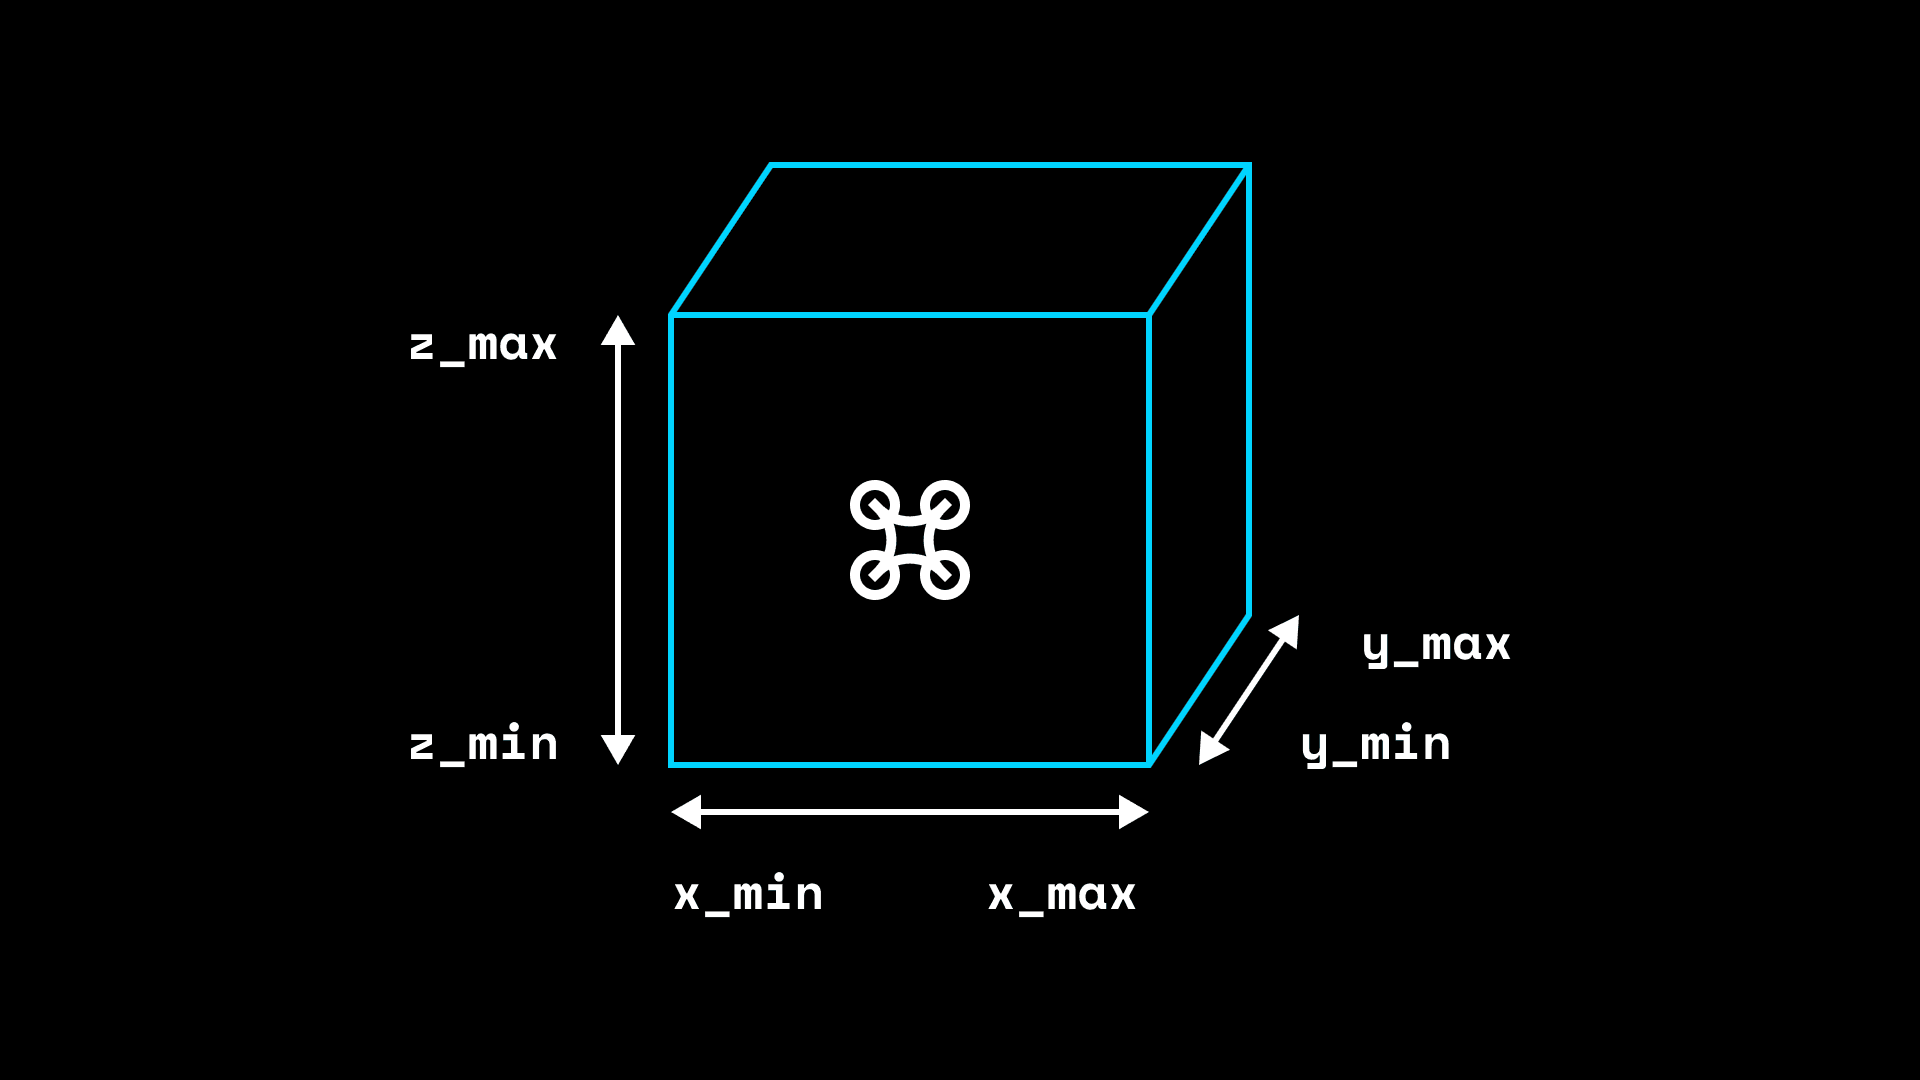
It's always a good idea to have a physical fence around the flight volume. We bought netting from a pet store, but obviously it's better to ensure the drone doesn't fly where it shouldn't. For this we build a virtual fence in code.
This is extremely important since we are using an "outside-in" mocap that works in a finite volume. If we send control signals to the drone while it's outside the mocap volume, it will destabilize and crash. Out of the box, the SDK doesn't ensure that this doesn't happen: it's easy to send the drone to a location that's not tracked, and to destabilize while it's there. We need to make sure of two things:
- We never send a setpoint outside the mocap volume.
- If the drone is outside the safe volume, we land.
We define the boundaries of a 3D fence in our options. Then, in every iteration of the main loop, we check to see that the drone is inside the boundaries of the fence. If the drone has gone astray, we break the main loop and land.
We also set a cf_trackingLoss_treshold option and a global cf_trackingLoss variable to keep tabs on the mocap tracking quality. We will receive data from QTM continuously, and if that data doesn't contain valid tracking for the Crazyflie, we increment the cf_trackingLoss counter. When we get good tracking data, we reset the counter. (More on this later.) We compare the counter to a threshold we set in the beginning, to make sure that tracking is fine.
The above makes sure that the drone lands safely if we lose tracking. To make sure that we don't send the drone outside the mocap volume, we need one more thing: have the target coordinate stay inside the fence. So we simply clamp the target setpoints to fence boundaries. This is where the fence_margin option comes into play. Though we clamp the control signal inside the fence, it's still possible for the drone to slightly overshoot when it's right at boundary. So the actual safety fence is slightly larger than the setpoints' fence.
Notice that the fence boundaries are defined with respect to the QTM coordinate system. Be careful if you recalibrate!
# Options: Physical Config
x_min = -1.0 # in m
x_max = 1.0 # in m
y_min = -1.0 # in m
y_max = 1.0 # in m
z_min = 0.0 # in m
z_max = 1.5 # in m
fence_margin = 0.2 # in m
cf_trackingLoss_treshold = 100

...

# Global vars
fly = True
cf_trackingLoss = 0

...

while (fly == True):

    # Land if drone strays out of fence
    if not x_min - fence_margin < cf_pose.x < x_max + fence_margin
    or not y_min - fence_margin < cf_pose.y < y_max + fence_margin
    or not z_min - fence_margin < cf_pose.z < z_max + fence_margin:
        print("DRONE HAS LEFT SAFE ZONE!")
        break
    # Land if drone disappears
    if cf_trackingLoss > cf_trackingLoss_treshold:
        print("TRACKING LOST FOR " + str(cf_trackingLoss_treshold) + " FRAMES!")
	break

    ...

    # Keep target inside fence
    target_pose.x = max(x_min, min(target.x, x_max))
    target_pose.y = max(y_min, min(target.y, y_max))
    target_pose.z = max(z_min, min(target.z, z_max))
Speed Limit
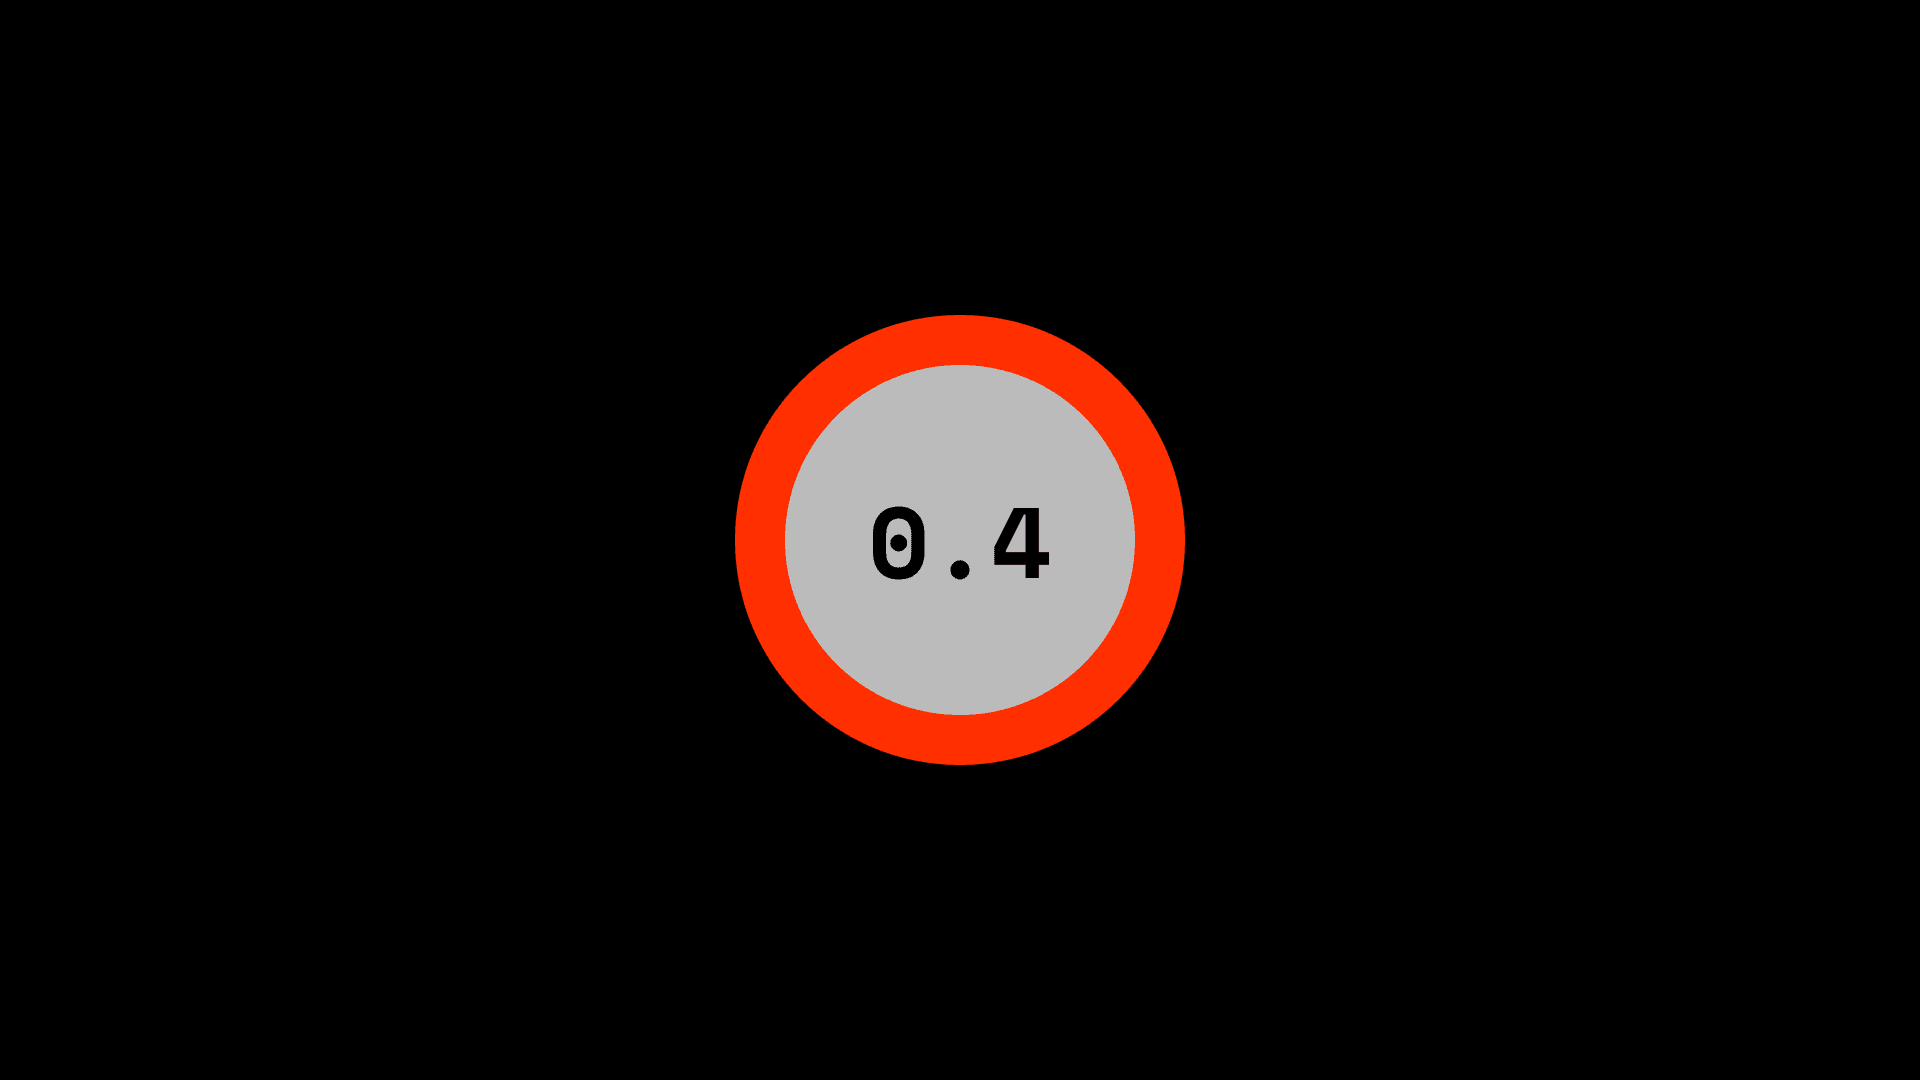
Using the Crazylie's parameters system, we can set internal limits on how fast it's allowed to go. There are two parameters for the speed limit xyVelMax for lateral movement, and zVelMax for vertical movement.
The actual value for these is set at the beginning of the script (in a unit of m/s), and passed to cf.param.set_value() right before takeoff.
# Options: Physical Config
cf_max_vel = 0.4 # in m/s

...

# Slow down
cf.param.set_value('posCtlPid.xyVelMax', cf_max_vel)
cf.param.set_value('posCtlPid.zVelMax', cf_max_vel)
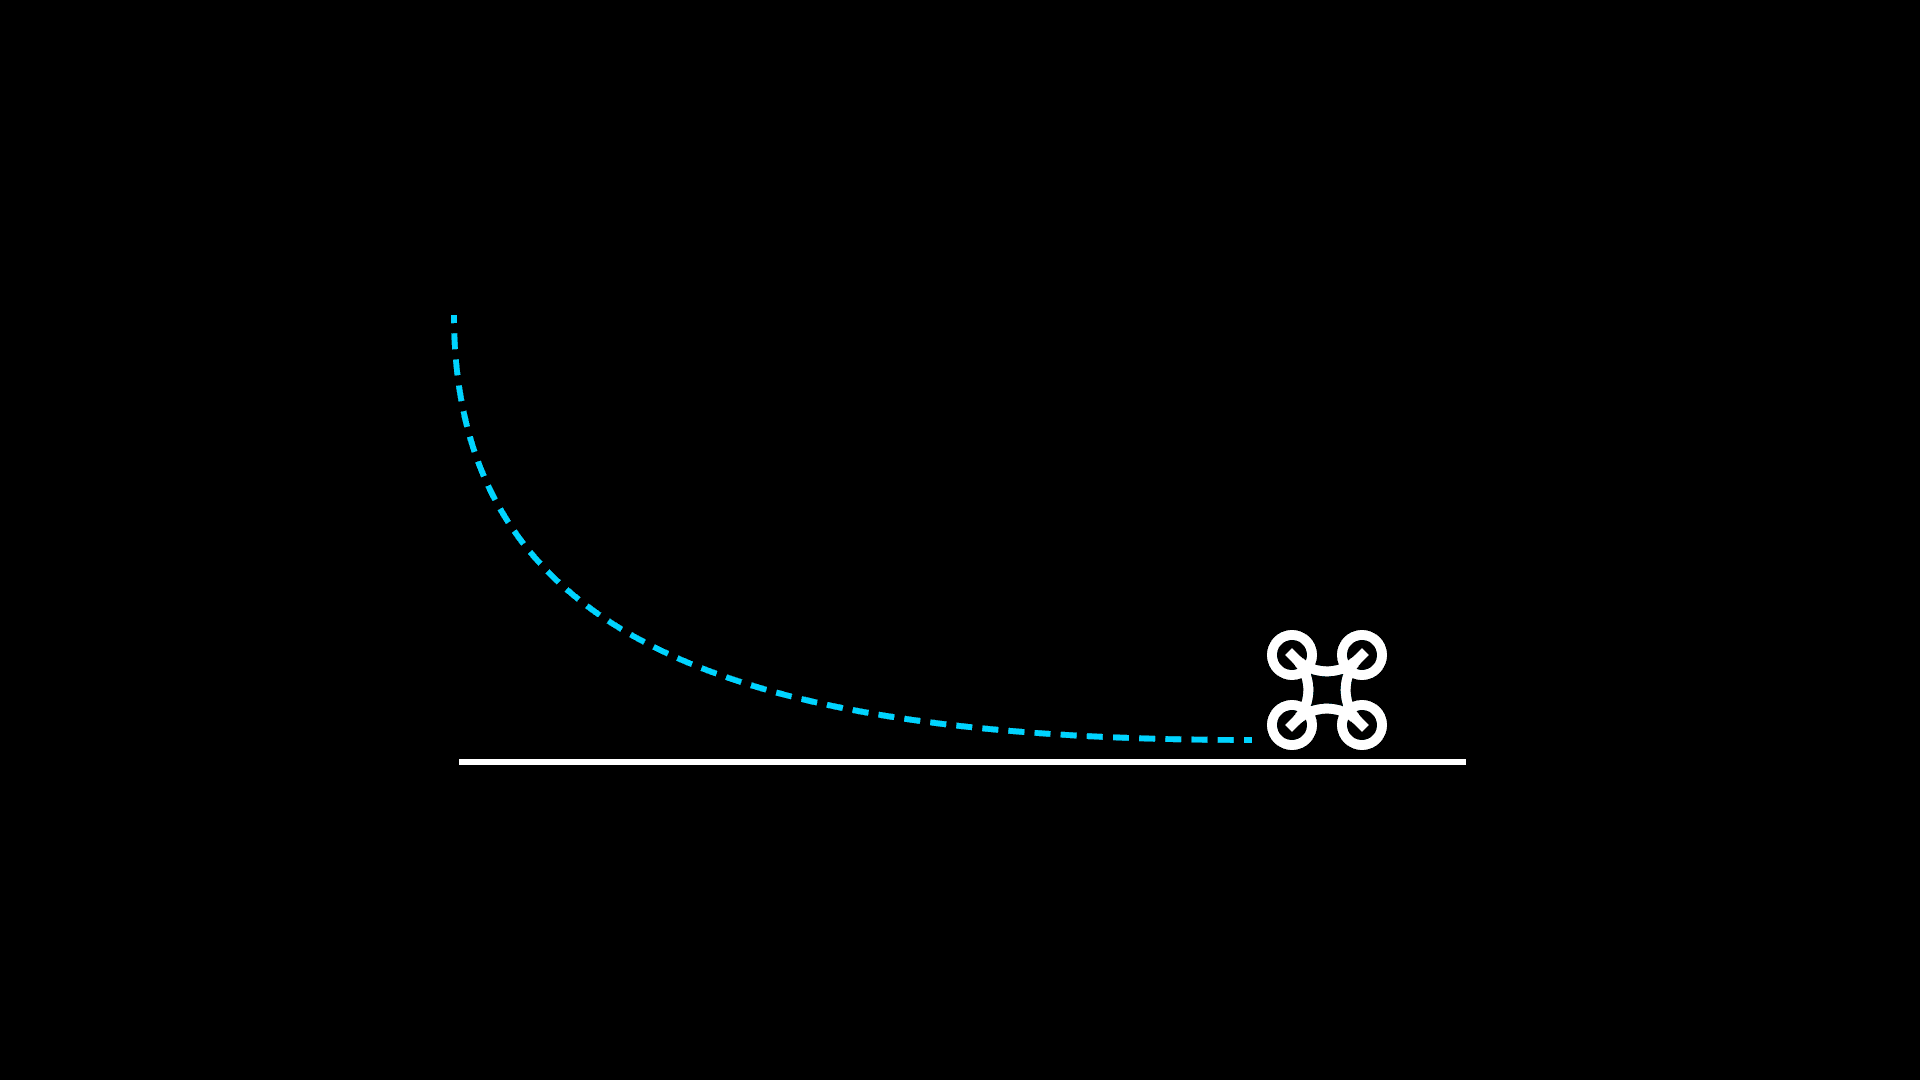
A slow speed limit drastically improves stability and safety. It lowers your probability of crashing, as well as the damage done if when you do.
This is handy because we will be controlling the drone with position setpoint commands – we will tell it where to go, not how to go there. It's also handy because the speed limit set with internal parameters stays in effect even if tracking fails – so if we crash, we'll crash slow.
Unfortunately, at this time, there is no way to set a rotational speed limit. It would have been very useful to be able to limit the yaw rate – our #1 reason for crashing at the moment is when the Crazyflie is unable to stabilize itself after rotating a little too eagerly.
We haven't found a complete documentation for the parameters system at this time, but Bitcraze's GUI client offers a Parameters tab if you'd like to explore them.
Landing
Other than crashes, one reason why the Crazyflie is prone to hurting itself is that it doesn't automatically perform a calm landing when we stop sending commands to it. It simply stops its motors mid-air and drops to the floor. To minimize damage to the drone, we must program a landing sequence into our script.
The landing sequence initiates whenever we break out of the flight loop for whatever reason. We use the cf.commander.send_setpoint() command to cut thrust gradually, which we found to work reasonably even when tracking is disrupted.
while (fly == True):
    # Do things
    ...

# Land calmly if fly loop is broken
print("Landing...")
for z in range(5, 0, -1):
    cf.commander.send_hover_setpoint(0, 0, 0, float(z) / 10)
    time.sleep(0.15)
Interactivity
The Pose Class
Pose is the term used in engineering to refer to the combination of position (x, y, z coordinates) and orientation (rotations around x, y, z axes), describing an object's whereabouts in six degrees of freedom (6DoF).
To keep the rest of the code clean, we implemented a Pose class to keep track of this information for each object that we are tracking, and to hold some utility functions for dealing with pose data.
We can retrieve pose from QTM in two ways: one represents orientation as Euler angles, and the other provides a 3x3 rotation matrix. Both can be useful for us, so the Pose class has class methods that can instantiate it from both kinds of information.
One thing to watch out for is that the roll, pitch, and yaw for the Euler angles and the rot attribute for the rotation matrix are independent -- updating one does not affect the other. This is counterintuitive, but it's fine as long as you're aware of it. (We haven't implemented a method to convert between the two because it's better to retrieve either from QTM at any time.)
class Pose:
    """Holds pose data with euler angles and/or rotation matrix"""
    def __init__(self, x, y, z, roll=None, pitch=None, yaw=None, rot=None):
        self.x = x
        self.y = y
        self.z = z
        self.roll = roll
        self.pitch = pitch
        self.yaw = yaw
        self.rot = rot

    @classmethod
    def from_qtm_6d(cls, qtm_6d):
    	"""Build pose from rigid body data in QTM 6d component"""
        ...

    @classmethod
    def from_qtm_6deuler(cls, qtm_6deuler):
    	"""Build pose from rigid body data in QTM 6deuler component"""
    	...

    def distance_to(self, other_point):
        """Calculate linear distance between two pose objects"""
        ...

    def is_valid(self):
        """Check if any of the coodinates are NaN"""
        ...

    def __str__(self):
        """Print nicely"""
        ...
Global Variables
We use global variables to keep track of where things are and expose this data to different parts of our program. This is handy because interactivity features like receiving tracking data from QTM and listening to the keyboard will be done on their own threads, and we need to be able to share data between these threads.
# Global vars
fly = True
cf_trackingLoss = 0
cf_pose = Pose(0, 0, 0)
controller_poses = []
for i, controller_body_name in enumerate(controller_body_names):
	controller_poses[i] = Pose(0, 0, 0)
controller_select = 0
fly is the "on switch" for our drone. Setting this to false at any time will terminate the flight and cause the drone to (hopefully) execute the landing sequence.
cf_trackingloss is a counter that is incremented if we receive a packet from QTM which does not contain a valid pose for the Crazyflie. If we don't receive pose from QTM, that means we are not in control anymore. It's actually fine if this happens for a fraction of a second (which it often does), but if we don't get pose for more than a few seconds the drone will become unstable. To prevent this from happening we constantly check this counter against the cf_trackingLoss_treshold option that we set in the beginning. If cf_trackingloss exceeds cf_trackingLoss_treshold, it's time to land.
cf_pose and controller_poses hold the pose data for all the things we're tracking.
controller_select specifies which controller body the Crazyflie should follow. Obviously, the drone can only follow one target at a time, and this variable says which one.
Tracking and Controllers
QTM will stream data to us asynchronously. We don't poll the motion capture system for data, we use asynchronous callbacks instead.
The QTM real-time protocol does allow polling if that's what you'd like to do, but the best-documented examples for the Qualisys Python SDK are all built on asynchronous streaming, so that's what we use.
To handle our connection with QTM, we built a QtmConnector class which subclasses Thread. We can't cover everything about threading in this tutorial – luckily there are many resources (including the official threading module docs) if you wish to learn more. We'll focus on the _connect() and _on_packet() asynchronous functions that we define in this class, which are important for how we implement interactivity.
_connect() is called once, when we initialize the connection. Here we check if the rigid bodies set up in QTM correspond to what our script is expecting to find. At the beginning of the script, we specify what the QTM rigid body names are for the Crazyflie as well as any controller objects. Rigid bodies with those names must be present in the QTM project. If they are not, we abort the script.
# Options: QTM rigid body names
cf_body_name = 'cf'
controller_body_names = ['traqr', 'tello']

...

class QtmConnector(Thread):
    """Run QTM connection on its own thread."""

    ...

    async def _connect(self):

	...

        if cf_body_name in self.bodyToIdx:
            print("Crazyflie body '" + cf_body_name + "' found in QTM 6DOF bodies.")
        else:
            print("Crazyflie body '" + cf_body_name + "' not found in QTM 6DOF bodies!")
            print("Aborting...")
            self._stay_open = False

         for controller_body_name in controller_body_names:
         	if controller_body_name in self.bodyToIdx:
	            print("Controller body '" + controller_body_name + "' found in QTM 6DOF bodies.")
	        else:
	            print("Controller body '" + controller_body_name + "' not found in QTM 6DOF bodies!")
	            print("Aborting...")
            	self._stay_open = False

        await self.connection.stream_frames(components=['6d', '6deuler'], on_packet=self._on_packet)
_on_packet() is triggered continuously, whenever QTM sends 6DOF data our way. This is one of the most important components of this script: it receives data about where everything is in the physical world, and writes that to the global variables which can be read elsewhere in the program.
# Global vars
cf_trackingLoss = 0
cf_pose = Pose(0, 0, 0)
controller_poses = []
for i, controller_body_name in enumerate(controller_body_names):
	controller_poses[i] = Pose(0, 0, 0)

class QtmConnector(Thread):

    ...

    def _on_packet(self, packet):
        global cf_pose, controller_poses, cf_trackingLoss
        # We need the 6d component to send full pose to Crazyflie,
        # and the 6deuler component for convenient calculations
        header, component_6d = packet.get_6d()
        header, component_6deuler = packet.get_6d_euler()

        if component_6d is None:
            print('No 6d component in QTM packet!')
            return

        if component_6deuler is None:
            print('No 6deuler component in QTM packet!')
            return

        # Get 6DOF data for Crazyflie
        cf_6d = component_6d[self.bodyToIdx[cf_body_name]]
        # Store in temp until validity is checked
        _cf_pose = Pose.from_qtm_6d(cf_6d)
        # Check validity
        if _cf_pose.is_valid():
        	# Update global var for pose
        	cf_pose = _cf_pose
            # Stream full pose to Crazyflie
            if self.on_cf_pose:
                self.on_cf_pose([cf_pose.x, cf_pose.y, cf_pose.z, cf_pose.rot])
                cf_trackingLoss = 0
        else:
        	cf_trackingLoss += 1

        # Get 6DOF data for controllers and update globals
        for i, controller_body_name in enumerate(controller_body_names):
	        controller_6deuler = qtm_6deuler[self.bodyToIdx[controller_body_name]]
	        _controller_pose = Pose.from_qtm_6deuler(controller_6deuler)
	        if _controller_pose.is_valid():
	        	controller_poses[i] = _controller_pose
Keyboard
We capture keyboard input for three purposes: to have an emergency landing button, and to adjust parameters like the controller-target offset in real time. We use the pynput to monitor the keyboard, which runs on its own thread.
If you wish to have multiple controller objects and select between them in real time, that also can be handled via keyboard interaction and global variables.
def on_press(key):
    """React to keyboard."""
    global fly, controller_offset_x, controller_offset_y, controller_offset_z
    if key == keyboard.Key.esc:
        fly = False
    if hasattr(key, 'char'):
        if key.char == "a":
            controller_offset_x -= 0.1
        if key.char == "d":
            controller_offset_x += 0.1
        if key.char == "s":
            controller_offset_y -= 0.1
        if key.char == "w":
            controller_offset_y += 0.1
        if key.char == "z":
            controller_offset_z -= 0.1
        if key.char == "x":
            controller_offset_z += 0.1
        print("Offset: X: {:5.2f}  Y: {:5.2f}  Z: {:5.2f}".format(
                controller_offset_x, controller_offset_y, controller_offset_z))

...


with SyncCrazyflie(cf_uri, cf=Crazyflie(rw_cache='./cache')) as scf:
    cf = scf.cf

    listener = keyboard.Listener(on_press=on_press)
    listener.start()
Conclusion
The Crazyflie is a great platform, but experimental applications like real-time object tracking require, well, experimentation. We went through a lot of trial and error to come up with our implementation, and it's still possible that you'll find rough edges as you go through it. If you'd like to provide any comments, suggestions, corrections, or just chat, free to hit me up on Twitter or LinkedIn, or drop an issue on the source for this page on GitHub.
Acknowledgements
This tutorial is derived from work in our ongoing research project on Social Drones, funded by the The Wallenberg AI, Autonomous Systems and Software Program – Humanities and Society (WASP-HS) and led by professors Morten Fjeld and Sara Ljungblad at Chalmers University of Technology.
We're grateful for the support we received from Bitcraze and Qualisys, where Kimberly McGuire, Kristoffer Richardsson, Magnus Berlander, Martin Holmberg, Fred Helmesjö, Erwin Schoonderwaldt, Katarina Hjältman, Daniel Thompson, Helen Holmqvist Rydén and their colleagues have been very generous with their time and resources.
We'd also like to thank our collaborators at Lindholmen Science Park – including but not limited to Daniel William Abrahammson, Catrine Henriksson, Åsa Andblad, Peter Andersson – as well as Atvis and Peter Wallberg, for lending us the facilities and support to take our projects to the next level.
Research References
You can find some of our publications based on interactive drones below, and visit my research page to check out the latest projects.
Mafalda Gamboa, Mehmet Aydın Baytaş and Sara Ljungblad (2021). Wisp: a Design Case for Temporality in Research through Design in Human-Robot Companionship. Paper for the HRI '21 Workshop Research Through Design Approaches in Human-Robot Interaction (RTDxHRI). [PDF]
Joseph La Delfa, Mehmet Aydın Baytaş, Nick Huppert, & Ian Peake, Leah Heiss (2020). Using Pose Estimation for Cultivating Subtleties in Human-Drone Interaction. Paper for the NordiCHI ‘20 workshop Programming for Moving Bodies. [PDF]
Joseph La Delfa, Mehmet Aydın Baytaş, Emma Luke, Ben Koder, & Florian ‘Floyd’ Mueller (2020). Designing Drone Chi: Unpacking the Thinking and Making of Somaesthetic Human-Drone Interaction. In Proceedings of the 2020 Conference on Designing Interactive Systems (DIS ‘20). [PDF]
Joseph La Delfa, Mehmet Aydın Baytaş, Rakesh Patibanda, Hazel Ngari, Rohit Ashok Khot, & Florian ‘Floyd’ Mueller (2020). Drone Chi: Somaesthetic Human-Drone Interaction. In Proceedings of the 2020 CHI Conference on Human Factors in Computing Systems (CHI ’20). [PDF]
Mehmet Aydın Baytaş, Sara Ljungblad, Joseph La Delfa, & Morten Fjeld (2020). Agent Archetypes for Human-Drone Interaction: Social Robots or Objects with Intent?. In Proceedings of the Interdisciplinary Workshop on Human-Drone Interaction (iHDI 2020). [PDF]
Mehmet Aydın Baytaş, Damla Çay, Yuchong Zhang, Mohammad Obaid, Asım Evren Yantaç, & Morten Fjeld (2019). The Design of Social Drones: A Review of Studies on Autonomous Flyers in Inhabited Environments. In Proceedings of the 2019 CHI Conference on Human Factors in Computing Systems (CHI ’19). [PDF]
Joseph La Delfa, Mehmet Aydın Baytaş, Olivia Wichtowski, Rohit Ashok Khot, & Florian ‘Floyd’ Mueller (2019). Are Drones Meditative?. In Extended Abstracts of the 2019 CHI Conference on Human Factors in Computing Systems (CHI EA ‘19). [PDF]
Mehmet Aydın Baytaş, Mohammad Obaid, Joseph La Delfa, Asım Evren Yantaç, & Morten Fjeld (2019). Integrated Apparatus for Empirical Studies with Embodied Autonomous Social Drones. In Proceedings of the International Workshop on Human-Drone Interaction (iHDI). [PDF]